We stopped updating this site on June 30, 2024. From now on, information on Educational Campus-wide Computing System (ECCS) will be provided at utelecon
The Portal Site of Information Systems @ UTokyo.
[ECCS Cloud Email]How to set up email account in mailer (Thunderbird)
FAQ (Frequently Asked Questions)
Updated: August 30, 2016
August 30, 2016
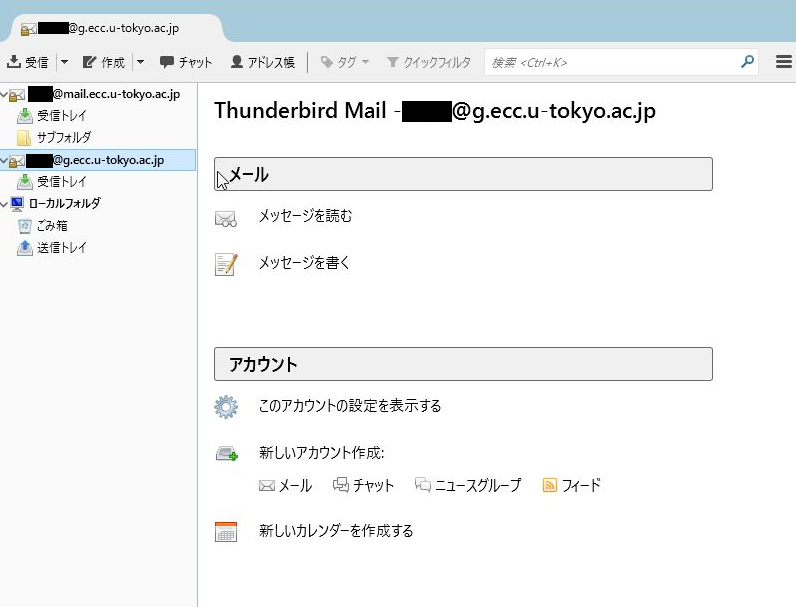
- The following is written on the basis that the user already uses Thunderbird
- If you are a new user, step 2 will be displayed, so please proceed from there as described.
- Versions of Thunderbird older than ver.38.0.1 does not support OAuth2 authentication and so cannot be used with ECCS Cloud Email. Please update to the latest version of Thunderbird.
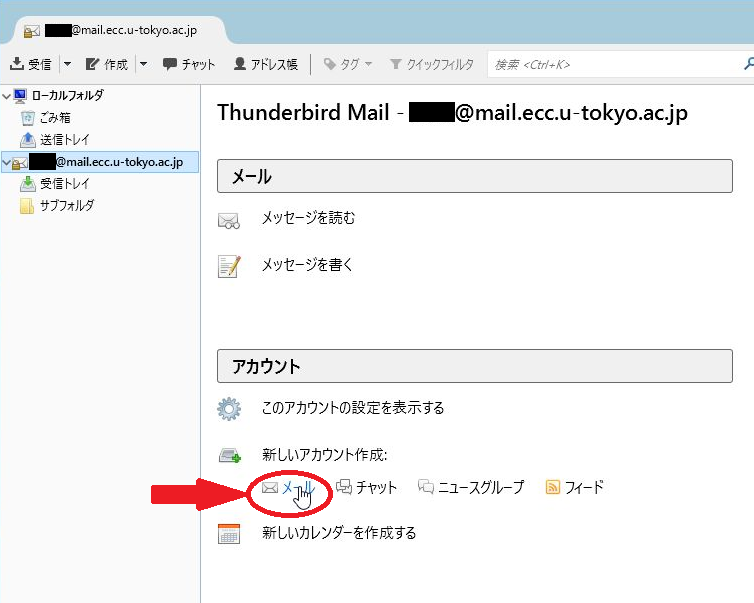
1. Start the Thunderbird and click on “メール (Mail)” in the “新しいアカウント作成 (Add Mail Account)”
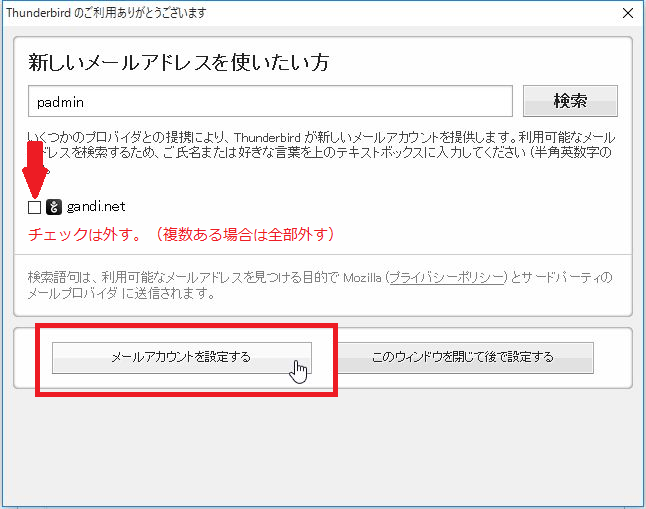
2. Uncheck the all check boxes of "create partner providers account", and click on “メールアカウントを作成する (Add Mail Account)”
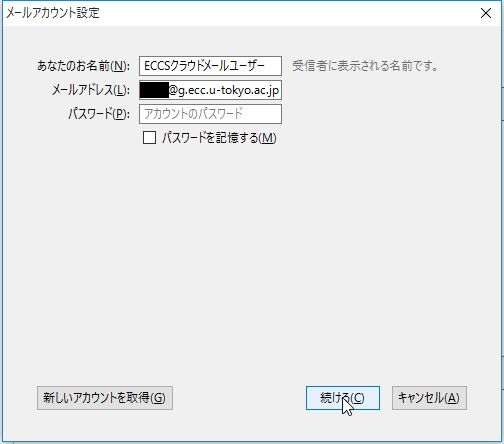
3. Enter your display name and the email address of ECCS Cloud Email in the appropriate fields.
- You do not need to enter the password at this point.
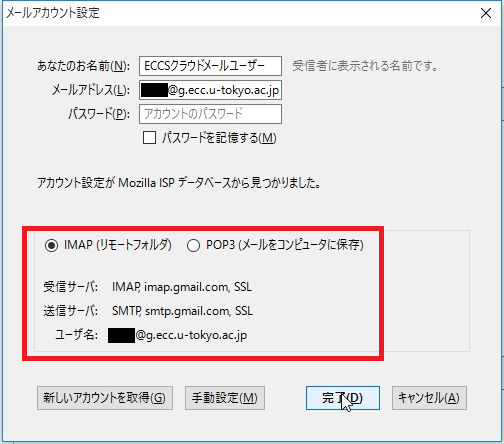
4. When the following information appears at the bottom of the screen, please click "完了"(Done)
- The user has the option of selecting either IMAP or POP.
However, emails will be deleted from the server once you read the emails on a terminal when you select POP with a normal setting.
If you wish to use other terminals to read the e-mails, please use IMAP or change the settings to leave the emails on the server.
- The receiving server is imap.gmail.com, SSL
- The transmission server is smtp.gmail.com, SSL
- The username is the ECCS Cloud Email address which was set in the previous section.
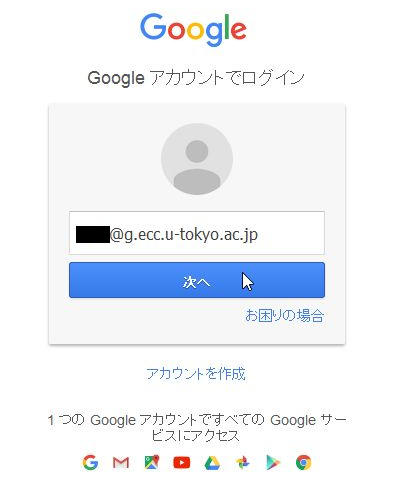
5. The window for a two-step authentication will open. Make sure that the email address that you are trying to set is displayed, and click on the "次へ (Next)".
6. After the screen transit to the prompt, enter the password for the ECCS Cloud Email that you have already updated.

- If you have not started using ECCS Cloud Email and have not yet changed the password, please change the password first using the link below.
- Notification: How to Use ECCS Cloud Email
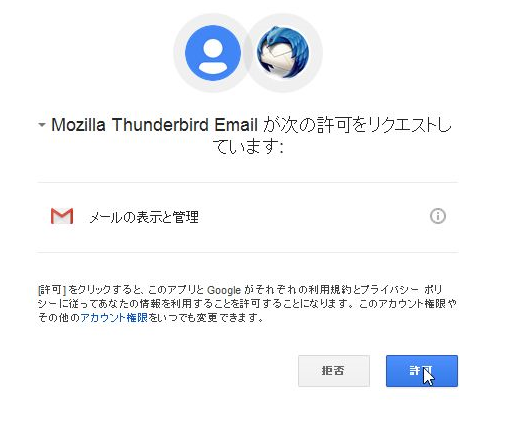
7. Click on “許可(Accept)” when the following screen is displayed.
8. If the ECCS Cloud Email address has been added to the list of email address, then the process is complete.
