We stopped updating this site on June 30, 2024. From now on, information on Educational Campus-wide Computing System (ECCS) will be provided at utelecon
The Portal Site of Information Systems @ UTokyo.
How to set up IPP printing -Windows-
FAQ (Frequently Asked Questions)
Updated: December 12, 2017
December 12, 2017
When using ECCS2016, it is possible to print using the multi-function printers for ECCS (RICOH MP C4503) by sending the print job from a PC connected to the campus network to the IPP (Internet Printing Protocol) printing server printer.ecc.u-tokyo.ac.jp.
The following provides information on how to set up in the Windows 10 environment.
- Note: The password for IPP printing has been changed to a dedicated password in March, 2017. Those that used the IIP printing before this date must be careful as the printing process is no longer the same as before.
1. Download printer driver
Please search for MP C4503 in "drivers for printer and multifunction machines " on RICOH’s website (support.ricoh.com), and download the printer driver that is compatible to your OS version (including whether it is 64 bit or 32 bit)
- Fiery controller is not attached.
- The downloaded driver's file is a self-extracting file.
- After extracting the file, a confirmation window for executing the “install printer driver” will be displayed. However, please click No and do not install at this point.
2. Delate the existing printer
- You need to delete the existing printer if you have used IPP printing before March 22, 2017.
If you do not have an existing printer, please proceed to “3. Add Printer”.
- Open “Devices and Printers” in the control panel, select the existing printer and right-click.
Select “Delete the device” from the menu and click.
- After selecting a printer icon in the “Devices and Printers”, when the “Print server properties” appears on the tool bar, click on it.
- If “RGateIPPPrinter” is listed in the Port listing, select it and click “Delete Port”.
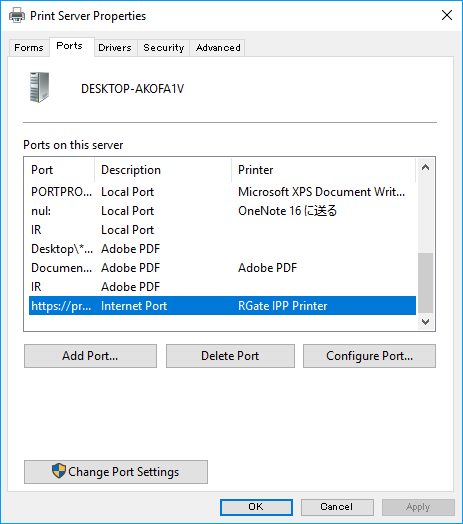
3. Add Printer
- Open “Settings” from the Start Menu, and select “Devices” followed by ”Printers & scanners” and then "Add printers & scanners"
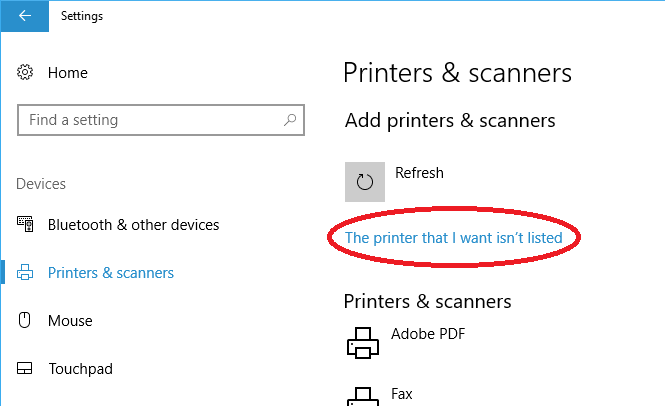
- Click on the "The printer that I want isn't listed" link that will appear after a while.

- After the “Find a printer by other options” window opens, check on the “Select a shared printer by name” and enter https://printer.ecc.u-tokyo.ac.jp/Main_Mono in the space below, then click “Next”
- Main_Mono is the setting for black-and-white printing. If you want to set for color printing, please repeat this procedure, and enter "Main_Color" instead of "Main_Mono".
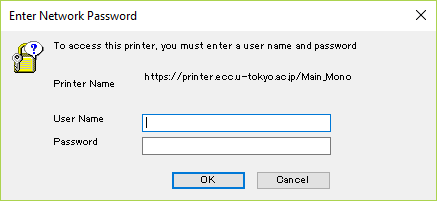
- Please enter the user name and password which is the same as your ECCS Account. (The user name for ECCS 2016 is the Common ID number)
- Enter the IPP printing password set up in the UTokyo Account User Menu. For details on the IPP printing password, please see “Introducing IPP Printing Password"
4. Set up printer driver

- Click “Have Disk…” when the “Add Printer Wizard” appears
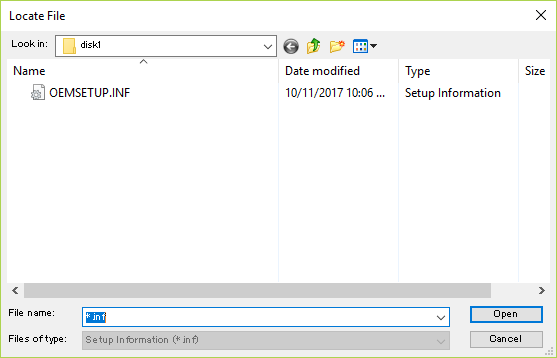
- When the “Install from Floppy Disk” window appears, click “Reference…” and select “disk 1” from the printer driver folder extracted in step 1. OEMSETUP.INF in the appropriate folder will be selected automatically.
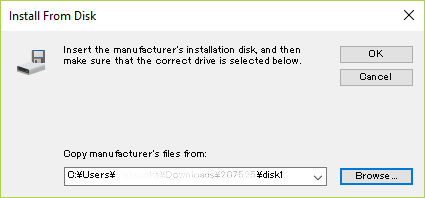
- After going back to the “Install from Disk” window, confirm that the printer driver folder extracted in step 1 is selected in “Copy manufacturer’s files from”, then click “OK”.
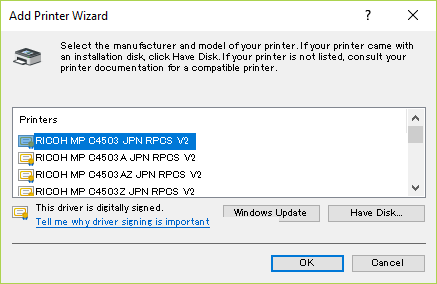
- A list of RICOH printers should be displayed in the “Add Printer Wizard”. Please select RICOH MP C4503 JPN RPCS V2 from the list and click “OK”.
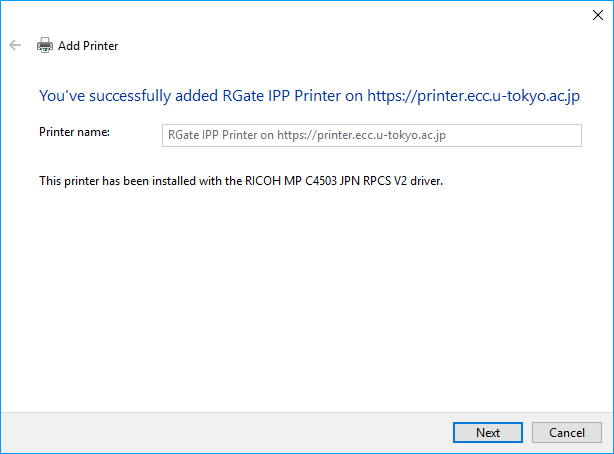
- If “RGate IPP Printer (https://printer.ecc.u-tokyo.ac.jp 上)” is displayed in the “Add a printer or scanner” window, click “Next” and the installation will be completed.
More Information
- If you change your password for ECCS, please repeat the settings for the printer driver.